Monday, November 12, 2012

Paella

Having a weekday off is great, I think we all should have a 3 day weekend! But in England the weather is so miserable with the constant rain. The only thing we were able to do on such a gloomy day was grocery shopping, and even that was depressing, with the long queues at the check outs.

So to pick myself up I wanted to make a dish that reminded me of happier sunnier times. I went on a cruise a few years back in the middle of August to the mediterranean. In particular I loved visiting Valencia, Spain. Whilst we were there, Formula 1 was racing and the temperature was a high 32 degrees. How I have missed the hot sun beaming down on me. So to commemorate that holiday I decided to make Paella tonight.


Plus I had left over chicken stock from last nights dinner, so I might as well use it up.

I remember the Paella I ate in Valencia, in particular the black squid ink paella, it was out of this world. Unfortunately I was unable to get my hand on squid today, so I decided to improvise with what I had at home.


A Paella pan would have been handy in this instance but I had to settle with using a wok instead. It worked very well and the rice cooked just as evenly.


My B wanted a very meat filled rice dish so I used a larger quantity of chicken and chorizo in making this dish. However I prefer a seafood based Paella. I suppose it would make the dish cheaper by using less seafood in the dish.

Paella (Serves 3-4)


  • 300g Paella rice
  • 4 boneless chicken legs (cut into bite size pieces)
  • 150g chorizo (sliced)
  • 1 L chicken stock
  • 4 garlic cloves (minced)
  • 1 onion (diced)
  • 1 green pepper (diced)
  • 2 tomatoes (diced)
  • 1 large pack of mixed seafood (mixture of prawns, shrimps, mussels, etc.)
  • 2 tsp paprika
  • 1/2 tsp salt (or to taste)
  • ground black pepper (to taste)
  • parsley (to garnish)
  • lemon wedges (to serve)
Heat 1 tbsp of oil in a pan/wok to brown the chicken pieces. Set aside.


In the same pan/wok, fry the chorizo slices. Add the garlic and onion. Fry until softened. 

Add the tomato and green pepper. Fry until softened. Sprinkle the paprika and salt into the mixture. Stir to combine.


Pour in the paella rice, making sure it is evenly distributed in the pan/wok.

Pour in the chicken stock. Lay the chicken pieces back into the pan/wok.


Cover the pan/wok with a lid and leave to simmer on a low-medium heat for 10 minutes. 


After 10 minutes, lay the seafood around the surface of the rice and cover the lid again to leave for another 5-10 minutes. Make sure the rice is al dente and the stock is completely absorbed by the rice. Try not to agitate the rice too much whilst it is cooking. 


When ready to serve, sprinkle with parsley and serve with lemon wedges. Enjoy.


Sunday, November 11, 2012

Hainanese Chicken and Rice

It is nearly the end of 2012 and I have not left the country once. It is probably the first time in my life that I have not had a holiday within a year. I suppose at the moment saving up for a wedding is more important than to holiday in some winter sun. I have to keep telling myself that fact to feel less envious of my friends posting up their holiday snaps online.

Even my parents in Hong Kong are on their second holiday of the year in Singapore. I hope they have a lovely time over there, especially as the temperature over there is 31C whereas I am wrapped up indoors with an average temperature of 2C outside.


So to make myself feel a little less deprived from the luxury of warm weather I decided to make some food to remind me of somewhere warm. Since my parents are over in Singapore at the moment I decided to make their national dish of Hainanese Chicken. It made me feel a little closer to my parents, we maybe eating the same dish at the same time at opposite sides of the world.

I have never eaten this dish before, but when searching for it online it seemed very similar to the traditional Cantonese Steamed Chicken my mum often makes. The rice is traditionally cooked using the chicken stock left over from cooking the chicken, which makes the whole meal more appetising.


Hainanese Chicken is traditionally eaten with a hot chilli sauce but instead I made a hot ginger and string onion dipping sauce to accompany the dish. I put my own twist on the dish by not following the typical recipes I found (mainly because I had not done my weekly shopping yet, so had to make do with what was left in my fridge). Even though I have never tasted Hainanese Chicken my version was still very yummy. Next time I go shopping, I will buy some pandan leaves to try out the recipes more faithfully to see which version is better.


Hainanese Chicken and Rice


  • 1 whole chicken
  • 2 tsp salt
  • 2 pieces of one-inch cube of root ginger (smash one piece and slice the other piece)
  • 2 cloves of garlic
  • 3 stalks of spring onions (slice one spring onion finely and leave the other two whole)
  • 2 carrots (peeled and halved)
  • 1 green chilli (seeds removed and finely diced)
  • 2 cups of long grain rice (washed and drained)
Wash the chicken and pat dry the inside cavity and the skin on the outside. Cut out any excess fat and reserve for use later. 

Heat up a large pot (big enough to fit the whole chicken) with enough water to cover the chicken.  

Rub the salt over the chicken skin and the inner cavity. Place 2 stalks of spring onions and two slices of ginger into the cavity.


When the water is boiled, add the carrots and one of the pieces of ginger. Carefully place the chicken into the water. Allow the water to boil again, turn the heat down slightly and allow to simmer for 20 minutes. After 20 minutes, turn the chicken over and turn off the heat. Cover the pot with a lid and allow it to rest in the water for another 20 minutes. 

While the chicken is sitting in the stock for the last 20 minutes, heat up a frying pan. When hot add in the reserved fat of the chicken and fry to melt the fat to become oil. When the fat pieces have started to burn remove the pieces. Add the remaining sliced ginger, garlic, sliced spring onions and chilli. Add the drained rice and stir to combine all the ingredients. Turn off the heat.


Transfer the ingredients into a rice cooker and add in two and half cups of stock. Turn on the rice cooker to cook the rice.


When the chicken has rested for the 20 minutes in the stock. Carefully lift out the chicken from the stock and place in a large bowl of iced cold water.  When cooled, chop the chicken into smaller pieces.


Serve the chicken with the rice and any choice of sauce, i.e. chilli sauce or ginger and spring onion dipping sauce.


Saturday, November 3, 2012

Profiteroles

What pass time would occupy me on a cold autumnal day? Baking of course!

I am not a great baker. I love to bake but have never got the hang of making cakes, pies, bread, etc. So what better way to start but to make my ultimate gluttony laden dessert - Chocolate Profiteroles.

We usually buy these at the supermarket, these perfectly round light airy pastry filled with fresh cream and dipped in chocolate, definitely my idea of pure heaven. Why not try to make this luxurious recipe?

My 1st attempt of profiteroles


I followed a typical profiterole recipe from a book - Grandma's best recipes from Love Food. The recipe looked straight-forward enough, or at least I thought so. The level of difficulty for perfecting the consistency of the batter for the choux bun is way beyond my comprehension. I should just stick to baking fairy cakes and cupcakes. But I will persevere, I will not give up! As they say - Practice Makes Perfect!

Book's version - how it's supposed to look like


My first attempt was, let's say, not very attractive and not at all like the picture shown in the book. But do not judge a book by it's cover, the taste was pretty spot on. My second batch was less of a success, it was under baked and very flat. So I decided to ditch the second lot and make do with my first. I think I may need to practice this recipe a few more times to hone this skill.

My first batch of flat choux buns


My profiteroles may not look the part but it was still very tasty and gained much praise from my brother and his girlfriend.


To hide the fact that the recipe did not result in the cookbook perfect presentation, I also made a sponge cake filled with nutella as a back up dessert. And my brother's girlfriend also brought over an apple crumble so we were filled up on a trio of desserts which left us pretty food drunk by the end of the evening.


Profiteroles


  • 5tbsp butter 
  • 200ml water
  • 100g plain flour
  • 3 eggs (beaten)
  • 300ml double cream
  • 1tbsp caster sugar
  • 125g milk chocolate
  • 2 1/2 tbsp butter
  • 6tbsp water
Preheat the oven to 200C.

Grease a large baking sheet with butter.

For the pastry: place the water and 5tbsp of butter in a saucepan and bring to the boil. Meanwhile, sift the flour into a bowl. Remove the saucepan from the heat and beat in the flour until smooth. Cool for 5 minutes.


Beat in enough of the eggs to give the mixture a soft, dropping consistency.


Transfer to a piping bag fitted with a 1cm plain nozzle. Pipe small balls onto the baking sheet. Bake for 25 minutes. Remove from the oven. Pierce each ball with a skewer to let steam escape.

For the filling: whip together the cream and sugar. Cut the pastry balls almost in half, then fill with the cream filling.


For the sauce: gently melt the 2 1/2 tbsp of butter with the water in a small saucepan, stirring, until smooth. Pile the profiteroles into a dish and pour over the sauce and serve.


Thursday, November 1, 2012

Homemade Steamed Cheong Fun

Today my B and I gave our notice to get married at the registry office! So it is all finalised and no backing out. We were interviewed by the registrar to make sure we were legal and legit. We were asked some very strange questions like, are you two related? Have either of you two been married before? I'm pleased to say the answers were all NO. Now that the formality is over with, we have just got to wait for 15 days to see if anyone objects to our marriage, and if all is well, we will be getting married next year in July. There are lots to prepare and arrange, even though neither of us are particularly stressed (I'm sure that is yet to come!). I hope I don't turn into one of those bridezillas!

So to celebrate our first step towards our marriage, I decided to make us a lovely lunch. Cheong fun is always a favourite meal for lunch, not too filling but oh so yummy. Usually we buy a packet from the local Chinese supermarket, but I wanted to try to make it myself.


The traditional method involves a lot of complicated steps and difficult steaming processes; but after scouring the internet for alternative methods I became very confident that I could do it! The traditional method involves using a very thin cheesecloth as the receptacle to produce some paper thin cheong fun. I did not have any cheesecloth lying around my house and I do not possess a steam boat, so I improvised.

I used small dishes as receptacles to make my cheong fun, and a wok to mimic a steam boat. I have to say the cheong fun may not be as wafer thin as the ones I buy from the supermarket or presented as pretty as the ones served at restaurants, I was still very happy with the outcome.


I'm sure if I trial this method a few more times I will get the hang of the quantities and produce some consistently smooth and thin cheong fun. Either way, the flavour of the cheong fun is pretty much on par with the ones I buy from the store. It may be more time consuming but it is definitely worth the effort. Give it a go, i definitely will be.

Homemade Steamed Cheong Fun (I made 7 rolls)


  • 150g rice flour
  • 2tbsp wheat starch
  • 2tbsp corn flour
  • 450ml water
  • pinch of salt
  • 1tbsp vegetable oil
  • 10 dried shrimps
  • 4 scallions
  • Oil 

Soak the dried shrimps in a bowl of water for at least 1 hour. Drain and then dice into small pieces. Set aside.

Dice the scallions. Set aside.


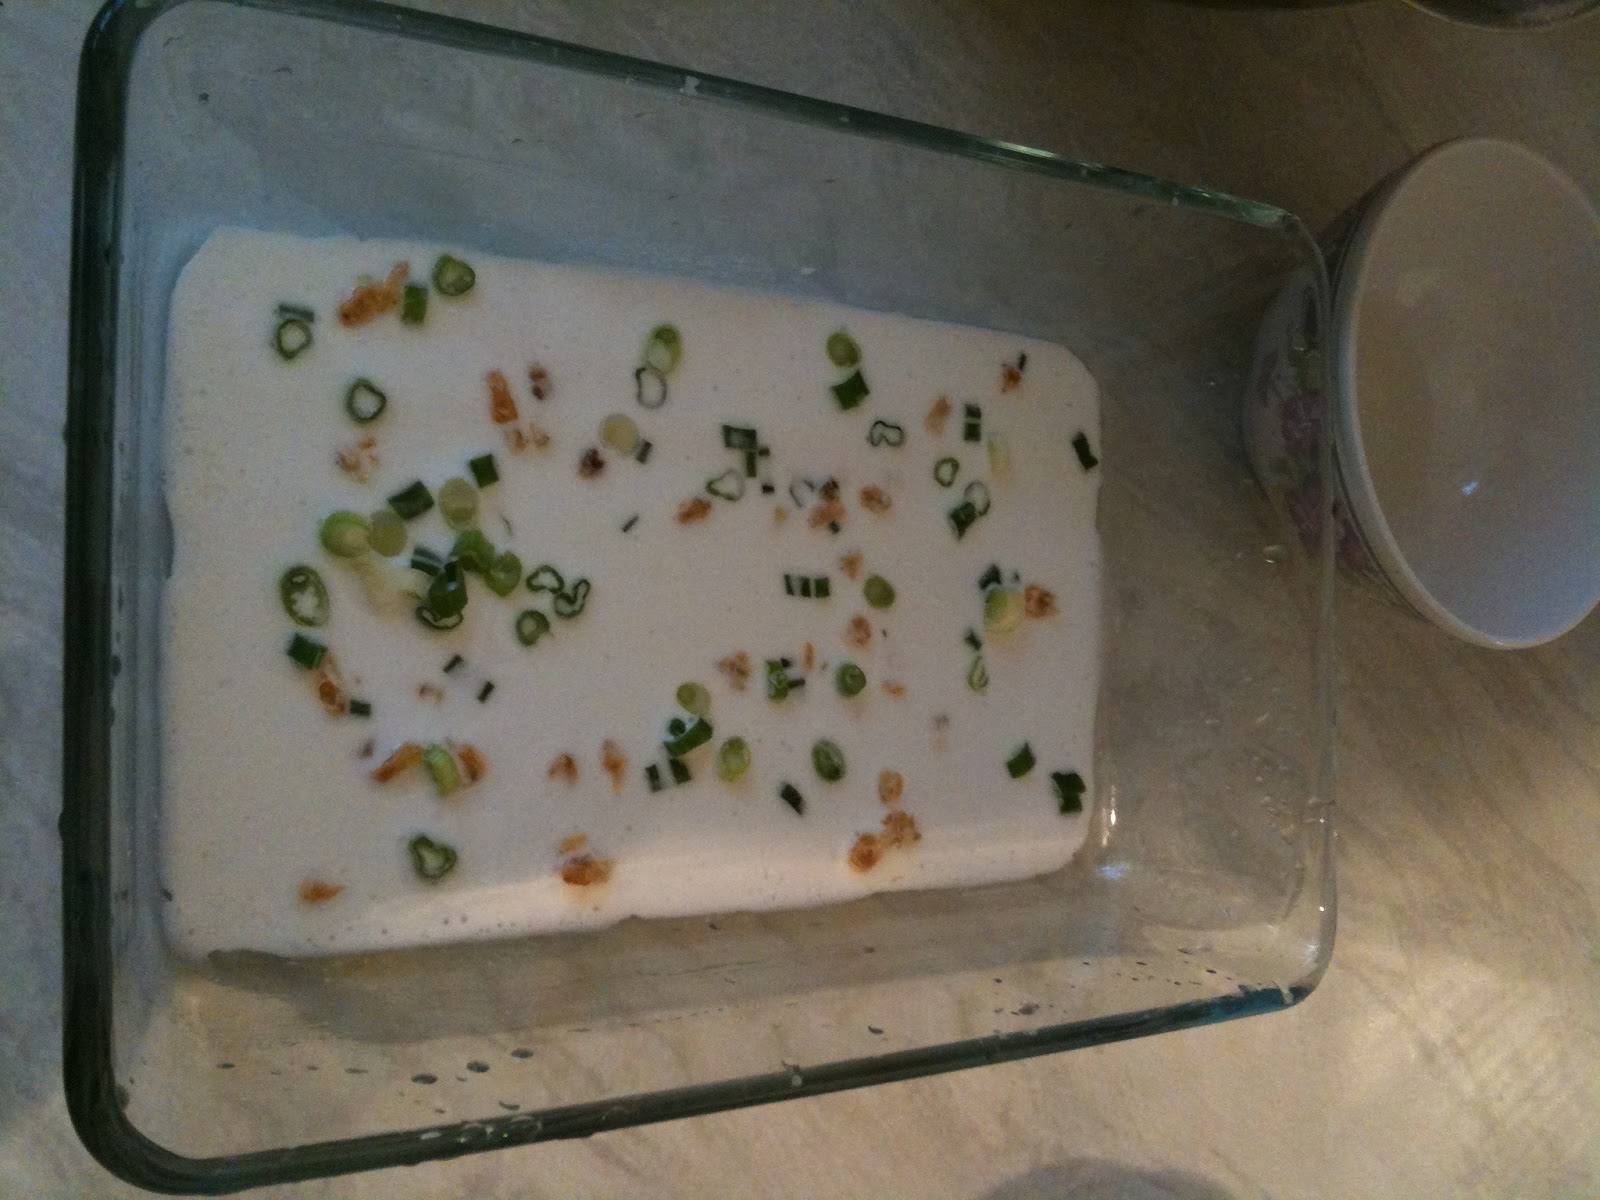
Mix the rice flour, wheat starch and corn flour in a mixing bowl.  Slowly combine the water to make a thin batter with a whisk. Add the salt and 1tbsp of oil. Cover with cling film and set aside for at least 1 hour to let it rest.


Heat up a wok with some water and place a rack on the bottom to act as the platform for the steamer.

Use two small dishes to steam the cheong fun.  Steam one dish at a time. Oil the bottom of the dishes.


Using a ladle, mix the batter to incorporate the flour and water mixture.

Spoon one ladle into the dish, then sprinkle some scallions and dried shrimps over the top.


Place onto the platform in the wok and cover with a lid, allow it to steam for 7 minutes.


After 7 minutes, remove from the wok. Set aside.

Repeat the process of ladling the batter and sprinkle the scallions and shrimps into the second dish and steam for 7 minutes.  The dishes can be interchanged once one has finished steaming to cut down time.


The ready steamed cheong fun can now be rolled up. Oil a flat spatula and scrape the sides of the cheong fun and carefully roll from one end to the other.


Repeat these procedures until all the batter is used up. Remember to oil the pan before every use. Also check you have enough water in the wok for steaming, top up if needed.

You can eat it now with some soy sauce, or you can pan fry it like I do.


Heat some oil in a frying pan and place the ready steamed and rolled cheong fun in.  When one side has browned, flip them over to brown the other side.


It is now ready to be served with plenty of hot chilli sauce, or my favourite, a combo of hoisin sauce and peanut sauce.


Enjoy!


Monday, October 29, 2012

Homemade Turnip Cake

In England, Sunday roasts usually bring the family together on the day of rest.  For the Chinese overseas we like to go Yam Cha 飲茶  at the local Chinese Restaurant.  It involves the whole family spanning a few generations sitting down together to enjoy many dishes of dim sums washed down with many cups of Chinese tea.

Dims sums  點心 can range from small dishes of steamed dumplings, rice dishes, noodle dishes, fried delicacies and sweet desserts.  In our family it is not surprising to find the table filled up with food and towers of bamboo steamers of chicken feet, dumplings and buns.  It allows all the family members to catch up on the latest gossips and any important events in each others lives.

My all time favourite dim sum dish has to be the turnip cake 蘿蔔糕.  It is a savoury cake made of daikon radish and various other ingredients.  The cake is cut into small pieces which is then fried in a wok to crisp up the outer skin.  This is probably not the healthiest of dim sums on the menu but to me it is one of the yummiest.  Served with a side of chilli sauce just brings out the flavours from each ingredient in the dish.  You would not be able to eat much of this dish as it can be very rich and oily but as there are usually other dishes to choose from, it is a great starter for the meal.

Traditionally turnip cake is made during the Chinese New Year celebrations.  This dish is served when friends or family come to your home to wish you Happy Chinese New Year.

When I was younger I stayed with my maternal grandparents in Hong Kong during the New Year celebrations.  In the living room, there was always a beautiful lacquer box filled with dried fruits and melon seeds laid out for the guests to nibble when they visited.  My grandma and aunties would then fry up a plate of turnip cake and yam cake to serve afterwards.  I was never a fan of yam cake as I found it too dry but the turnip cake was moist and flavourful.  I guess I found my love of turnip cake from that young age.

My mother always said that turnip cake was very hard to make and perfect, so I never thought about making it myself.  However following a heavy weekend I was itching to go yam cha but all the family was busy, so I decided to make turnip cake at home to satisfy my urge.

My mother and future mother-in-law were great sources to ask about the recipe, but they did not mention about quantity or measurements so I estimated most of it.  I only made one cake as I had half a daikon radish in the fridge left over from making braised beef earlier in the week.  I think the next time I make it, I will double the quantities to make more so that I can freeze it for another time especially since the preparation is quite long-winded.

The recipe turned out pretty well.  As the turnip cake was home made, I was able to add in more turnip and other ingredients to make it more textured and flavoursome.  The usual turnip cakes I order from the restaurant can be mostly made of flour and skimp on the other ingredients which make it more bland.

My B who usually hates turnip cake because he finds the texture too doughy and plain, ate a plate full of my homemade turnip cake.  He liked that the homemade version had more flavour and the texture of the cake was bulked up by the dried shrimps, scallions and Chinese sausage (lap cheung).  However, next time I make it I may add less water to the mixture to thicken up the cake so that when it is fried, the shape of the cake is maintained.


Surprisingly making the turnip cake turned out very straightforward and not as complicated as my mother always made it out to be.  I wished I had made this a long time before instead of making do with the restaurant version all these years.

Homemade Turnip Cake

  • 1/2 daikon radish (about 600kg) 
  • 12 dried shrimps
  • 1 Chinese sausage
  • 2 scallions 
  • 90g rice flour
  • 20g wheat starch
  • dash of shaoxing wine 
  • 1 tsp of soy sauce
  • 1 tsp of salt
  • 1/2 tsp of white peper
  • 1tsp of sugar
  • vegetable oil
Peel and grate the radish.  Leave to drain in a colander.  Make sure to collect the juice from the radish by placing a bowl underneath the colander.  The juice is saved to be used later.

Rinse and soak the dried shrimps in a small bowl of water for an hour.  When the shrimps have softened a bit, dice it finely.  Again save the soaked water of the dried shrimps for later use.

Dice the scallions and set aside.  

Dice the Chinese sausage and set aside.


Sieve the rice flour and wheat starch into a medium sized mixing bowl. 

Combine the juice from the daikon radish and the water from the dried shrimps.  Measure out 3/4 cup of this fluid.  

Slowly add the 3/4 cup of fluid into the flour and mix to make a batter.  Set aside.


Heat up 1 tbsp of oil in a wok.  When hot stir fry the scallion and Chinese sausage.  Mix it round a bit and then add the dried shrimps.  Stir fry for about 3 minutes until the ingredients start to take on colour.


Add in the drained daikon radish and stir fry for 5 minutes.  Add in the salt, sugar, pepper, soy sauce and wine.  Keep cooking until the mixture has softened and yields less fluid.  


Finally lower the heat and add in the flour mixture.  When adding this make sure to mix this into the radish mixture thoroughly.  I found a pair of chopsticks quite useful for the job.  It takes some muscle to combine the mixtures and the mixture should resemble a sticky dough.  Turn off the heat when all is combined.


Transfer to a well oiled pan ready for steaming.  Smooth the top with a spatula for even cooking.


Steam the turnip cake for about 40 minutes.  When the turnip cake finishes cooking, it will be quite wobbly.  Let the turnip cake cool in it's pan to harden up somewhat.  It is easier to cut when cooled down.


When ready to eat, cut the turnip cake into several slices or pieces.  Heat up some oil in a wok and fry the pieces of turnip cake.  Remember to leave some room between the pieces to avoid them sticking together.  


When one side has taken up some colour, turn it over to fry the opposite side.  I like it to be extra crispy on the outside so I brown it for a bit longer.  Take care not to burn it though.  


Dish up and serve with plenty of chilli sauce.