Wednesday, November 28, 2012

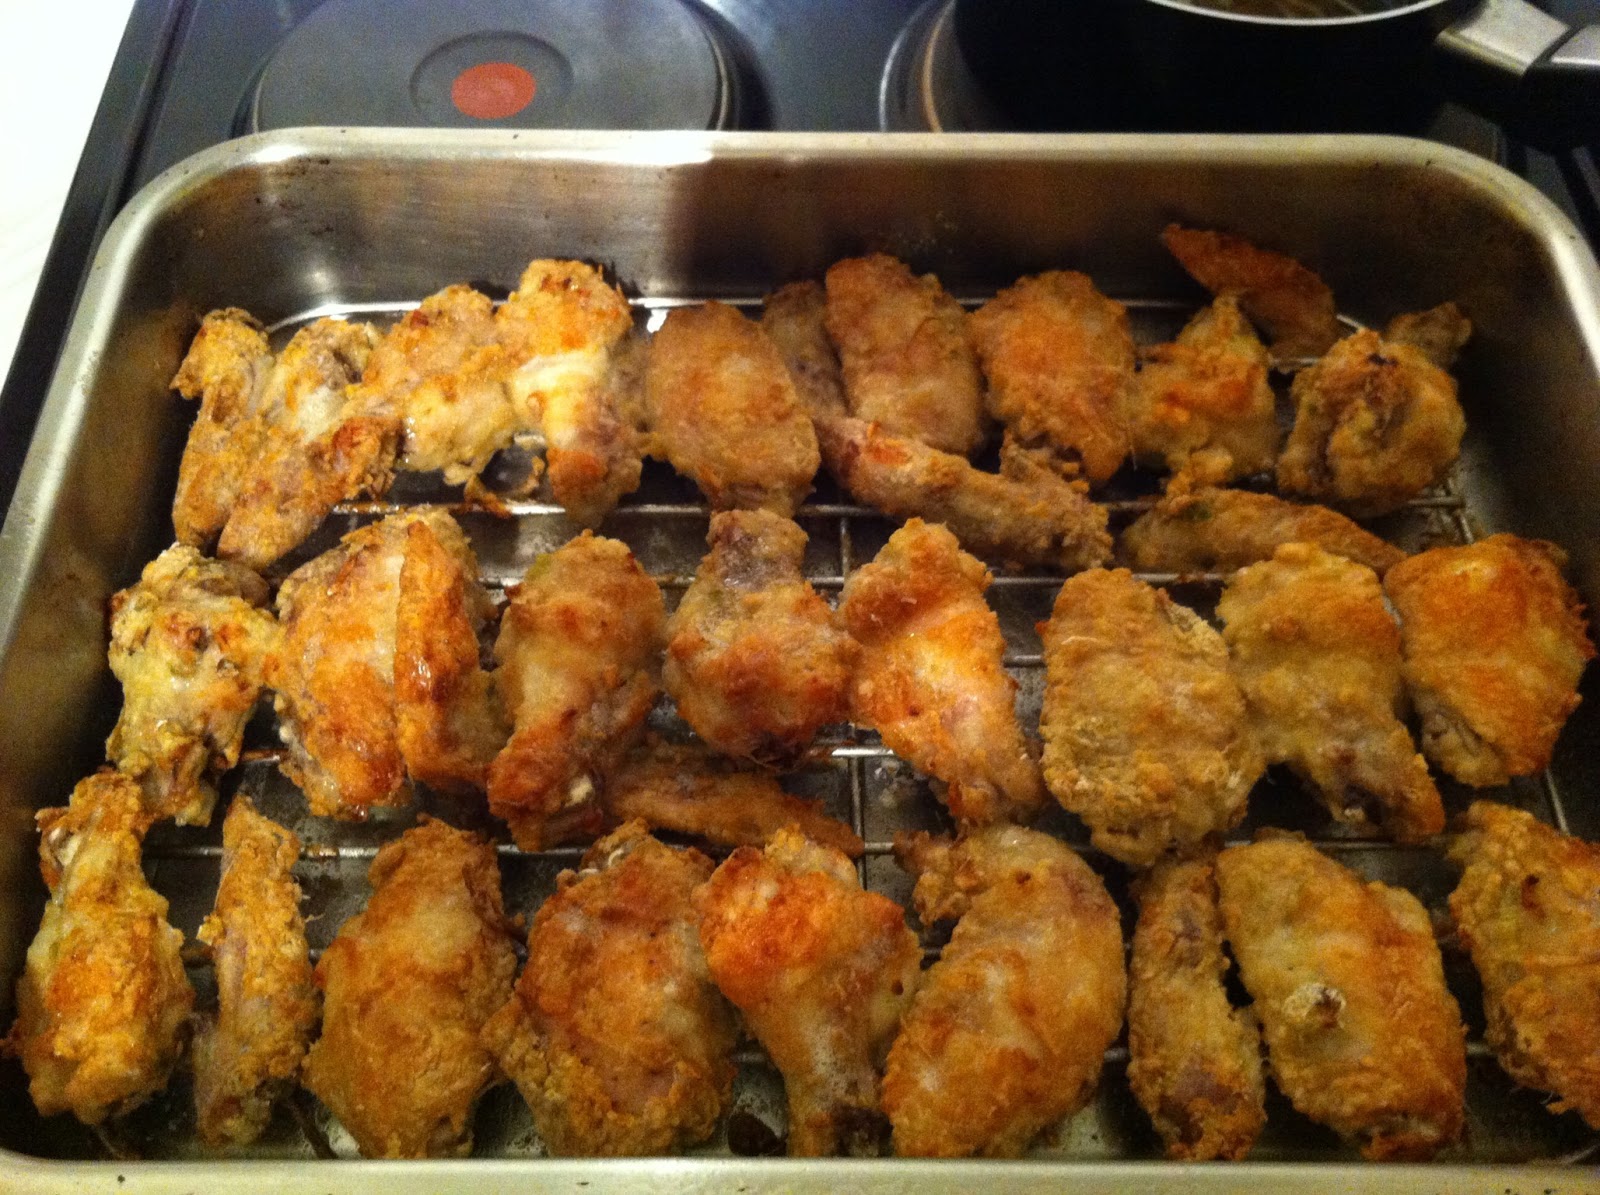
Crispy Lemongrass Chicken Wings with Sweet Lime Glaze

After a very busy day at work today I had a real craving for KFC (Kentucky Fried Chicken). The thought of tearing through a crispy coating of juicy succulent chicken was very tempting; but then my B reminded me of my mission to lose weight for the wedding and saving up to pay for it all. So no Family Bucket for us tonight.

But my craving for crispy chicken was still hankering me, so I needed to cave in without feeling too guilty after indulging myself. So I thought what a good time to experiment with a new recipe to curb my weakness of all things fried.


In my fridge were the usual Chinese must-have groceries: ginger, garlic, chilli, lemongrass, etc. So what better way to satisfy my need for crispy chicken than to use these ingredients.


I've made lemongrass chicken wings in the past but cooked in a sauce, so this time instead I will attempt a similar recipe but bake the chicken wings to make them crispy without deep frying that would make my house smell for a few days from the grease.


However just plain crispy chicken would be too dry so I needed to conjure up a sauce/glaze to accompany it. Lemongrass is complemented well with honey and lime so that would be the basis of my glaze.

The end result was even better than chicken from KFC, or at least that's what my B says, and considering he is the biggest KFC fan, that is saying something. Crispy chicken pieces covered in a sticky sweet and sour glaze definitely filled the void in my tummy. If only I had a bottle of Corona with a lime wedge, that would have been perfect.


I will definitely be making this recipe again in the future, a great dish for finger food at a party.

Crispy Lemongrass Chicken Wings with Sweet Lime Glaze

Chicken and marinade:

  • 12 chicken wings (de-jointed into mid wing, drumlette and wing tip)
  • 2 stalks of lemongrass (pounded and cut into shorter stalks)
  • 1 inch piece of ginger (minced)
  • 3 garlic cloves (minced)
  • 1 green chilli (finely chopped)
  • 2 stalks spring onions (finely chopped)
  • Zest of half lime (grated)
  • Juice of half lime
  • 1tbsp rice wine
  • 2 tsp fish sauce
  • 1/2 tsp salt
  • sprinkling of ground black pepper
Crispy coating:
  • 1 cup plain flour
  • 1 tsp baking powder
  • 1/4 tsp bicarbonate of soda
Sweet Lime Glaze:
  • juice of 1/2 lime
  • 2 tbsp rice wine
  • 1 tsp fish sauce
  • 1 tbsp sherry vinegar
  • 1 tbsp runny honey
  • 1-2 tbsp brown sugar (to taste)
  • 1/2 tsp corn starch
  • 2-3 tbsp of warm water (depending on desired consistency)
Place the chicken wing pieces into a large bowl. You can omit the wing tips if desired but I like eating the wing tips, they are extra crispy with baked).

De-jointed chicken pieces


In the large bowl of chicken wings add in all the marinade ingredients and mix to combine. Cling film over the bowl and leave in the refrigerator to chill for at 2-3 hours. (I only left it to marinade for an hour and it was still very flavourful).

Chicken in marinade


When the time is up, preheat the oven to 200C. Prepare a roasting tray with a wire grill to place the chicken on.

In a plastic bag, add in the plain flour, baking powder and bicarbonate of soda and shake to mix it up. Place 5-6 pieces of chicken pieces at a time into the bag and shake to completely cover the chicken with the flour. 

Bag with flour coating


Using chopsticks or tongs to pick up the floured chicken pieces onto the grill tray. Repeat for all the pieces of chicken until all are coated. 

Flour coated chicken pieces


Spray the chicken pieces with oil sparingly. 

Oil spray on the chicken pieces


Place the chicken into the oven and bake for 25 minutes. After that time, turn the chicken pieces over, spray with more oil and bake for another 25 minutes. 

Chicken cooked half way through
Finished chicken pieces


During the baking time, you can make the glaze.

Tip all the left over marinade ingredients from the bowl of chicken into a small saucepan, add in all the other ingredients of the glaze into the saucepan. Heat it up on medium heat for about 4-5 minutes until the sauce bubbles up and becomes more syrupy. Taste the glaze and adjust accordingly.

Left over marinade ingredients
Marinade ingredients in a saucepan
Added glaze ingredients
Finished syrupy glaze


When the chicken pieces have finished baking. Using chopsticks or tongs to place the crispy chicken pieces onto a serving dish and pour the glaze all over the chicken. Eat while it's still hot. 

Dished up chicken wings
Chicken with glaze


Saturday, November 24, 2012

Banana Bread

It is that time of year again, the end of November is time to start planning my christmas shopping list.  Many of my friends have pretty much finished their shopping spree so I feel very unprepared for this festive season. It only feels like yesterday that we were barbecuing in the garden in the Summer. This year has flown by, and I have just realised it is another 8 months till my wedding, argh.... Got to get my dress (or dresses) plus my bridesmaid dresses amongst other things. But today I must concentrate on my christmas list!


So to fuel my motivation of sorting out my present shopping plan I need a big mug of tea filled with caffeine and a sugar loaded cake.


Looking around my kitchen, I noticed two very sad and bruised bananas I had neglected for a good week or so. They were definitely way past their best but to avoid wastage I decided to make use of them in baking.


After scouring the internet for a simple yet appropriate banana recipe I settled for Banana Bread. I had all the ingredients in my larder and the preparation was so easy, even for me (a unsuccessful baker).

After waiting for the cake to cool, a couple of slices of this sweet cake and a large mug of strong English tea definitely did the job and I've nearly finished my plan on tackling christmas shopping. All I need to do now is to battle the crowds at the shopping centre tomorrow. I may even pick up a few festive food goodies at the German market, so looking forward to it. Plus I still have a few slices left over for tomorrow's breakfast, yum.


Banana Bread (makes 1 loaf)


  • 2 ripe large bananas (mashed)
  • 4 oz butter (melted)
  • 2 eggs (beaten)
  • 1tsp vanilla extract
  • 2 cups plain flour
  • 3/4 cup caster sugar
  • 1 tsp baking powder
  • 1/4 tsp bicarbonate soda
  • 1/4 tsp salt
  • 3 oz walnuts (chopped up into smaller pieces)
Preheat the oven to 180C.

In a large mixing bowl mix together the dry ingredients: flour, sugar, baking powder, bicarbonate soda, salt and walnuts, and stir to combine.


In another bowl mix together the wet ingredients: bananas, butter, eggs and vanilla extract.


Fold the wet ingredients mixture into the dry ingredients until it is all combined.

Line the loaf pan with baking paper or a loaf liner.


Pour all the ingredients into the loaf tin and you can decorate the top with extra banana slices or walnuts. 


Bake in the oven for about 1 hour or until a toothpick inserted into the centre comes out clean.  When ready leave to cool in the tin for 10 minutes before cooling completely on a wire rack.


Once cooled slice to eat.  


Thursday, November 22, 2012

Tiramisu

When the Winter draws in, what is the best remedy for perking up the day? Indulge in a dessert of rich coffee and chocolate filled Tiramisu.

What's not to like in a Tiramisu? It is layered with sponge soaked in rich coffee and liqueur, and sweet fluffy cream cheese, and finally dusted with a crumbly topping of chocolate flakes! Even describing it can make my mouth water.


The best thing though is that it is a dessert that only requires effortless assembly and no need to turn on the oven to bake. My fuss free choice of dessert that still looks ultra sophisticated.

I've used chocolate chunks instead of the traditional cocoa powder used in most recipes. I think it adds a little more texture to the dish and plus, I love Cadbury flakes!


My perfect food dream would be me with a large spatula digging into a massive dish of Tiramisu. But in reality I know I have to share this love of mine. So in order to keep up with my wedding diet, I've only eaten a small portion of this dessert and shared out the rest with my friends.


So far, I have not had any complaints from those who have tried it, but a couple of my girly friends have declined the offer because it contained raw eggs. So next time I make it, I will try omitting the egg from the recipe to be approved from my girly friends. However I'm not sure if it would still maintain it's fluffy rich consistency. I suppose it's another excuse to make it again!

Tiramisu (12-16 servings)


  • 3 eggs (yolk and white separated into two large mixing bowls)
  • 4 tbsp caster sugar
  • 300g cream cheese
  • 300g double cream
  • 250ml rich coffee (I used instant)
  • 5 tbsp coffee liqueur (I used Kalua)
  • 3 Cadbury flakes
  • 1 1/2 packs of sponge fingers
Beat the egg whites until it becomes stiff peaks (I used an electric mixer for this). Set aside.


Beat the double cream in a separate bowl until it becomes stiff peaks. Set aside.


In a separate bowl beat the egg yolk with the sugar until it is all mixed in and appears pale yellow in colour. Mix in the cream cheese and beaten double cream.  


Fold in the beaten egg whites carefully to create more air bubbles into the mixture to make it light and fluffy. Refrigerate until ready to use.


When the rich coffee has cooled, pour into a raised sided plate. Add in the coffee liqueur and mix. 


Put the empty serving dish next to the plate of coffee and get ready to dunk the sponge fingers. 


Dunk the sponge fingers, two at a time, into the coffee mixture and then place into the bottom of the serving dish. Repeat this process until the bottom of the dish is covered by one layer of soaked fingers. Be quick with this process because if the fingers are left too long in the coffee, it will soften and make it impossible to lift out. 


You can dribble a couple tbsp full of the coffee mixture over the layer of sponge fingers.


Next take the cream mixture out of the fridge and spread half of the cream onto the soaked sponge fingers to make a thick cream layer. 


Crumble 1 1/2 Cadbury flake and sprinkle over the cream layer. 


Next repeat the process of layering the coffee soaked sponge fingers, the remaining half of the cream and finally finish with a layer of Cadbury flake crumble.  


Cover the dish with cling film and refrigerate overnight. 

It is now ready to serve. 

Monday, November 12, 2012

Paella

Having a weekday off is great, I think we all should have a 3 day weekend! But in England the weather is so miserable with the constant rain. The only thing we were able to do on such a gloomy day was grocery shopping, and even that was depressing, with the long queues at the check outs.

So to pick myself up I wanted to make a dish that reminded me of happier sunnier times. I went on a cruise a few years back in the middle of August to the mediterranean. In particular I loved visiting Valencia, Spain. Whilst we were there, Formula 1 was racing and the temperature was a high 32 degrees. How I have missed the hot sun beaming down on me. So to commemorate that holiday I decided to make Paella tonight.


Plus I had left over chicken stock from last nights dinner, so I might as well use it up.

I remember the Paella I ate in Valencia, in particular the black squid ink paella, it was out of this world. Unfortunately I was unable to get my hand on squid today, so I decided to improvise with what I had at home.


A Paella pan would have been handy in this instance but I had to settle with using a wok instead. It worked very well and the rice cooked just as evenly.


My B wanted a very meat filled rice dish so I used a larger quantity of chicken and chorizo in making this dish. However I prefer a seafood based Paella. I suppose it would make the dish cheaper by using less seafood in the dish.

Paella (Serves 3-4)


  • 300g Paella rice
  • 4 boneless chicken legs (cut into bite size pieces)
  • 150g chorizo (sliced)
  • 1 L chicken stock
  • 4 garlic cloves (minced)
  • 1 onion (diced)
  • 1 green pepper (diced)
  • 2 tomatoes (diced)
  • 1 large pack of mixed seafood (mixture of prawns, shrimps, mussels, etc.)
  • 2 tsp paprika
  • 1/2 tsp salt (or to taste)
  • ground black pepper (to taste)
  • parsley (to garnish)
  • lemon wedges (to serve)
Heat 1 tbsp of oil in a pan/wok to brown the chicken pieces. Set aside.


In the same pan/wok, fry the chorizo slices. Add the garlic and onion. Fry until softened. 

Add the tomato and green pepper. Fry until softened. Sprinkle the paprika and salt into the mixture. Stir to combine.


Pour in the paella rice, making sure it is evenly distributed in the pan/wok.

Pour in the chicken stock. Lay the chicken pieces back into the pan/wok.


Cover the pan/wok with a lid and leave to simmer on a low-medium heat for 10 minutes. 


After 10 minutes, lay the seafood around the surface of the rice and cover the lid again to leave for another 5-10 minutes. Make sure the rice is al dente and the stock is completely absorbed by the rice. Try not to agitate the rice too much whilst it is cooking. 


When ready to serve, sprinkle with parsley and serve with lemon wedges. Enjoy.